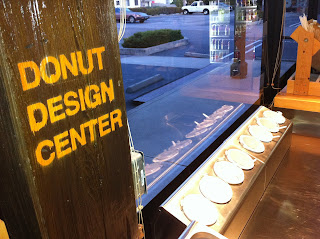
Sunday, June 19, 2011

Reinventing The Wheel...errr...Donut

The thought of saying "I'm on summer break" makes me giggle. Not many 30 year olds can throw that one out there. I didn't think I would ever have a summer break again, so allow me to revel in it a bit =] After signing all of my classmates yearbooks and telling them to K.I.T. ("keep in touch"...just joking by the way), I packed my bag and headed back to So Cal. On my way south, I stopped to visit some friends in San Luis Obispo; an adorable beach community about 2 hours north of Santa Barbara. Half it's population attends Cal Poly San Luiso Obispo college, so late night spots that have wifi, cool art hanging on the wall, indy music playing, with cool hipster customers are to be expected. But what I didn't expect was to find it in a donut shop!

Me and my friend Cami threw on our PJs, and headed to SLO Donut Company on a Friday evening. The minute I walked in, I knew I was in trouble. Not only was the girl behind the counter hip, she was very friendly and super helpful.
They had the classics like sugar
dusted, crumb, maple
bars, apple fritters, chocolate glaze, to name a few.

But they also had some really tasty new flavors like a chocolate filled pillow, bacon topped maple bars, cereal, PB & J filled, boysenberry and cream cheese filled, peanut butter filled with chocolate frosting...WOW!
One of my favorite parts was the "Design Your Own Donut" section. There was also a wall filled with used books that one can sift through wile enjoying one of these delectable donuts.
It is places like the SLO Donut Company that make me excited to see what the future holds for the culinary world; so many people with great visions and ideas of how to improve on something and make it an entirely new experience!

Tuesday, June 14, 2011

Make Your Own Mayo...It's Easier Than You Think!!


Ever find yourself having a sandwich that's a little blah? Maybe grilling some gourmet burgers this summer and looking for that extra something to put it over the top? Try making your own mayonnaise! It sounds a bit daunting to some (it definitely did me!), but when the chef finished the demo it I couldn't help but say "really!?! That's it?"...loud enough for the chef to hear...woops :p But it really was that easy! And it was a fast, simple way to put a homemade touch on your food.
The first step is to get your ingredients and tools set up. You will need a
good whisk and a stainless steel bowl as well as:
2 Egg yolks
1.5oz Lemon juice or light vinegar (wrap your lemon in cheesecloth for a
quick strain)
16floz Vegetable oil
6floz Cold water
1tsp Dry mustard
Salt & Pepp (optional) to taste

Whisk yolks with a bit of
water, mustard, salt, and lemon juice.
Start to pour the oil in SLOWLY while whisking vigorously, as oil begins to incorporate you can add the oil more quickly. AND
THAT'S IT!

If it gets too thick whisk in a bit more water. Season with more lemon
juice, salt, or pepper. It makes a great base to add minced garlic to make a
zesty spread on burgers, or cayenne pepper for a spicy topping on a grilled chicken sandwich!


Sunday, June 5, 2011

I Got Skillz

This week was the start of Skills Development 1. After the carnage of the last 3 weeks in Meat and Seafood Fabrication, Skills 1 has been quite tame. In fact, this last week was a bit blah in comparison. Skills 1 teaches the basics; stocks, broths, consummes, soups, bisques, etc. While not the most glamorous part of cuisine, a very important foundation to almost everything you make in the kitchen.
Veal stock is used as a base for many sauces and soups. Veal bones are much more mild in flavor, therefore making a great base to compliment the flavors
you add to it. You can also follow this production with beef bones if you do not know where to get veal bones.

First start with your mirepoix. A mirepoix is 2 parts onion, 1
part celery, 1 part carrots. It is the base for EVERY stock. In a brown stock, like veal or beef, you must caramelize the mirepoix. In a white stock, like chicken or white veal, you add the mirepoix raw. Make sure to chop the mirepoix in about 1/2" pieces which allow for even cooking.

Roast veal bones in a 400 degreeoven. Remove the bones from the oven after darkened and add to stock pot. If you
would like to add some extra flavor, add some heat to the sheet pan which held the veal bones, and add a splash of water, and deglaze the pan. cover the bones in the stock pot with water and let simmer.


One of my favorite techniques to adding flavor to a stock or soup is a sachet. It is cheesecloth filled with a bay leaf, thyme, and parsley. It is tied
tightly with twine and added to a stock. The great part is that you can remove it when you have the optimal flavor desired. Once the veal stack has reduced, aprox 5-6hrs, strain bones, mirepoix, and sachet. You now have a base for soups, sauces, and an extra flavor add for anything that requires liquid; simply reduce down and add meats and veggies. We made a great French Onion soup with
this stock!

Here's another useful tip for the home chef. If you ever find yourself with extra butter, I would recommend clarifying it. Clarified butter has a much longer shelf life and a higher smoke point; which makes it great for sauteeing! Simply melt butter with a slow simmer, and when the edges start to brown, you can skim off foam. The butter has separated from the water which has settled on the bottom of the pot. Slowly pour off butter until you see where the liquidy butter/water is. It's a great substitute for olive oil, and delicious on popcorn!!

Thursday, May 26, 2011

Sausage Fest

Today we finished up Meat ID & Fabrication. Over the last couple of days we covered pork, where we were shown how to break down an entire side of a hog:
And we also learned how to break down a lamb; basically imagine your family Labrador up on the counter and thats the size we were working with:
Yesterday we started the sausage making process. We seasoned chunks of meat overnight for the grinding we did today. After the grinder, the meat went into the casing machine. Almost ALL of the sausage you eat is cased with lamb, pig, or veal casing (intestine). They were DELICIOUS!

Ribs from the pig were brined overnight, and then thrown on the grill. Chef had a recipe up for an awesome BBQ sauce, just keep in mind it's 4 servings so scale it down a bit!:
It was pretty staggering to stand back and really take it all in. Seeing the animal in its primal form, before it ever comes close to a plate, is a strange experience. It hasn't made me want to be a vegetarian, but it has made me want to respect and honor the animal that gave it's life so we could enjoy things like breakfast sausage and baby back ribs smothered in Orange BBQ sauce. The fact of the matter is that we are blessed to live in a country that gives us choices.

There is a laundry list of effects that stress has on the meat of an animal. Having an animal live under stressful conditions before it is slaughtered can effect things texture, flavor, and moisture. Our chef instructor put it a good way, he said that "animals should be able to live a stress-free, humane life, with one really bad day." Holding pins, over populated cages, confined spaces all have serious impacts on the quality of food you're consuming; but there is a solution. Because we have the option to choose things like free-range, humane, and organic meats, we have the power to shift how our animals are processed. And I say "our animal" because it is yours! When you buy chicken, or steaks, you are buying that animal and you should have a say in how it's raised, fed, and slaughtered. Vote with your dollar, let the choices you make when buying meats dictate how our meat industry operates.

Tuesday, May 24, 2011

Holy Veal Leg Batman!


When the chef begins the class with, "if you've ever wrestled a midget into the trunk of a car, then you know what it's like to breakdown a veal leg", you know you're in for quite a day. Each of us received a leg that was about 40-50lbs, and it was a wrestling match the entire day! Hopefully you, as a home chef, will not be bringing home a 50lb hunk of veal to breakdown on the kitchen counter. But, if you should find yourself with some veal or pork cutlets, have I got a recipe for you!

Our chef used pork belly (where bacon comes from) and veal breast to make two roulades. In this pic, the veal is to the right of the chef, the pork belly is to the left. You can do this same
technique at home, but on a much smaller scale with cutlets or tenderloins that have been butterflied open. Here is the recipe he used for the rub in the center of the roulade:
Fresh Thyme (lots!)
Crushed bay leaves
Black Peppercorn
Garlic
Fennel seeds
Kosher salt
-Mix in a food processor with olive oil-
-lightly splash red wine vinegar on the meat before applying the rub-
Roll the meat tightly. We then trussed the meat, which is when you tie twine TIGHTLY around the roll to ensure the same thickness throughout for even cooking.
We skewered the roulades,
and roasted them on a spit for 6hrs...AMAZING! For the home kitchen, I would recommend
roasting your smaller roulade at 350 degrees and cook until 145 degrees internal temperature. Let the meat sit for about 5 min before slicing.

Monday, May 23, 2011

Where's The Beef!?!

This one's for all you steak lovers out there. I now know pretty much every cut of steak there is (or at least ones that are sold in restaurants), as well as where on the cow they came from. Now, I love a yummy NY strip, medium-rare, with a cracked peppercorn crust as much as the next guy, but there were some interesting things I learned about steaks.
The most surprising to me was the aging process all of our meats undergo before they ever reach your plate. There are two aging processes a cut of steak can go through; wet aging & dry aging. Wet aging is simply when the meat is sealed in a bag in its own juices, and is tenderized through that process. Most wet meat is aged for about 2 weeks. Dry aging, get ready for this, is when a large cut is simply set on a sheet pan in a moist cool storage room or refrigerator and rotated and pated every few days. It is usually aged this way 30 days or more! As you can see in this photo the meat will have a rind where all of the connective tissue juices (the things that make meat tough) seep out and dry on the surface:
Just below the rind of dried fat and juices is red, tender, delicious steak! The butcher or chef will simply cut away the rind to reveal the fruits of the aging process. Most fine dining restaurants either age their meat like this, or purchase meat that was aged in a similar fashion.

Here chef Almir is holding up an
aged rib eye: